
The Gear Trap: Why Beginners Overspend on Video Gear Kits Under $500
Building a video gear kit under $500 starts with knowing what to buy—and I’ve been making things on a budget my whole life. When I first picked up a camera, I was convinced I needed the same rig the big YouTube guys were using. A Sony FX6. A set of $2,000 cinema lenses. A cinema-grade tripod that weighed more than my backpack.
Turns out, I was dead wrong.
The best filmmakers I know started with less gear than you probably have in your closet right now. They learned lighting with work lamps. They recorded audio with a $40 lav. They got better by shooting, not by buying.
If you’re starting out in 2026 and your whole budget is under $500 — that’s plenty. More than plenty. Here’s exactly what I’d buy if I were starting from zero today.
These four video gear kits under $500 each serve a different purpose. Pick the one that matches your goals and you won’t waste a dollar.
| Kit | Total Cost | Best For |
|---|---|---|
| Budget Vlogging Kit | ~$350 | YouTube, talking head, social video |
| Filmmaker Starter Kit | ~$480 | Short films, narrative, interviews |
| Mobile Filmmaker Kit | ~$300 | Run-and-gun, travel, documentary |
| Audio-First Kit | ~$425 | Podcast, voiceover, interview content |
Video Gear Kit Under $500: The Budget Vlogging Kit (~$350)
If you’re talking to a camera — YouTube, social media, course content — this is your sweet spot. You don’t need a cinema camera. You need something that makes you look and sound good without a crew.
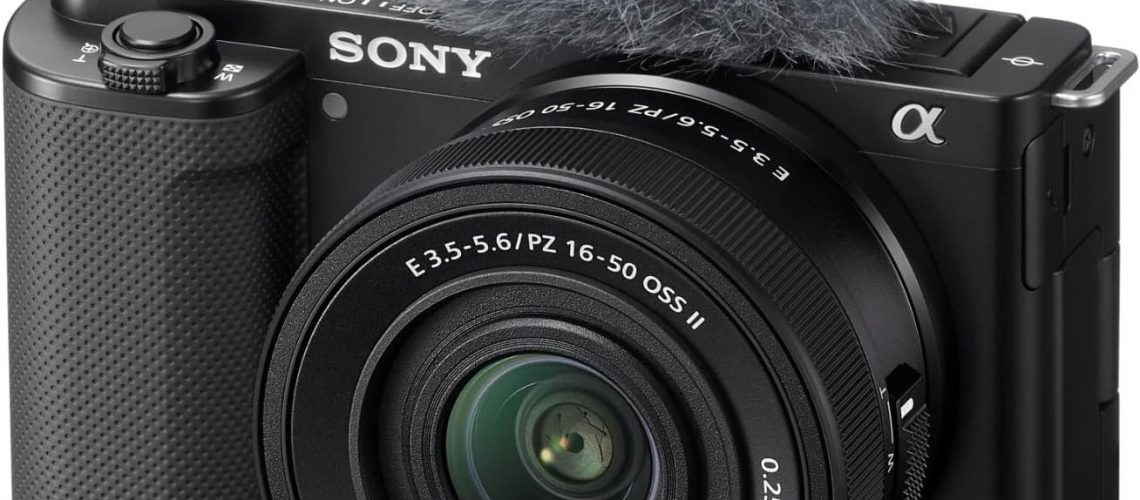
Start with the Sony ZV-E10 body. It’s been the budget vlogging king for years and for good reason. The autofocus is sticky, the flip-out screen works, and the microphone jack means you can actually use decent audio. Pair it with the kit lens (16-50mm) that usually comes bundled.
For audio, grab the Rode Wireless GO II. It’s a dual-channel wireless lav system that fits in your pocket. Clip one to your collar, press record, and your audio is cleaner than 90% of beginner videos. That’s the whole game.
Lighting? A $30 Neewer LED panel with adjustable brightness and color temperature. Put it at 45 degrees, slightly above eye level, and you’ll look better than half the videos on YouTube right now.
Real-world: The Solo YouTube Creator
Sarah (@budgetfilmmaker on YouTube) started with exactly this kit. ZV-E10, a $20 tripod, and a window-lit home office. She hit 50K subscribers in six months teaching other people how to film on a budget. She didn’t upgrade her camera for a full year — she upgraded her storytelling instead. That’s the move.
The Filmmaker Starter Kit (~$480)
This is for the person who isn’t vlogging — they’re making short films, interview content, or narrative work. You need more control over your image and your sound.
Here’s the controversial pick: skip the DSLR and get the Panasonic GH4 used. Yes, it’s older. Yes, it’s Micro Four Thirds. But it shoots 4K, has a gorgeous image with the right profile, and the lens ecosystem is cheap. A Panasonic 25mm f/1.7 gives you a nifty-fifty equivalent that looks legit cinematic for $150 new.
Audio is non-negotiable here. The Rode NTG2 shotgun mic on a boom pole or Zoom H1n recorder is the standard starting kit. It’s what film students have been using for a decade because it just works.
Tripod: don’t cheap out here. The Manfrotto Compact Action is $60 and will last you until you’re ready for a $300 video tripod. Fluid head, quick release plate, solid legs.
Real-world: The Festival Circuit
I know a guy who shot his first short — the one that got into Slamdance — on a GH4 with the 25mm f/1.7 and a Zoom H1n. Total camera and audio investment: about $600. The film was picked up for distribution. The festival didn’t ask what camera he used. They asked what his next project was.
The Mobile Filmmaker Kit (~$300)
Your phone is already a better camera than most beginners realize. The iPhone 16 Pro or Galaxy S25 Ultra shoots 4K video that rivals dedicated cameras from five years ago. The problem isn’t the image — it’s the support system around it.
Get the DJI OM 6 gimbal for phone. It’s compact, the active track works, and it turns your phone footage into something that looks intentional. For audio, the DJI Mic 2 is the best phone-compatible wireless lav right now.
Download the Blackmagic Camera app (free) to get actual manual controls on your phone. Shutter speed, ISO, focus peaking, the whole deal. The app is what separates phone footage from phone cinematography.
The remaining $100 goes into lighting. A small Aputure Amaran 60d is daylight-balanced, bicolor options exist, and it’s small enough to throw in a backpack. Point it at a white wall for diffusion and you’ve got a soft key light that looks expensive.
Real-world: The Travel Documentary
That viral “48 Hours in Tokyo” video with 3 million views? Shot entirely on an iPhone 14 Pro with a gimbal and a lav mic. The creator spent $120 on accessories and the rest on plane tickets. The views came from the story, not the sensor size.
The Audio-First Kit (~$425)
Here’s something nobody tells beginners: your audience will forgive mediocre video. They will not forgive bad audio.
If your content is interview-driven, podcast-style, or voiceover-heavy, lean hard into sound quality with a smaller camera budget.
Grab a Zoom P4 or Rodecaster Duo (used) as your audio hub. Pair it with a Shure MV7 mic — the USB/XLR hybrid that sounds great out of the box. For mobile recording, the Rode NT-USB Mini is $99 and punches way above its weight.
For your camera, use whatever phone you already own. The $425 goes into the audio chain. This will make you sound like a pro before you look like one — and that’s the right order.
What NOT to Buy
I’ve seen more beginners waste money on these than anything else. Spare yourself:
- The $500 gimbal for a $300 camera. You don’t need a Ronin. You need a tripod and steady hands.
- Variable ND filters before you know what they do. Learn exposure first. The ND comes later.
- A second camera body before you’ve mastered the first. One camera you know completely beats two cameras you half-know.
- “Cinema” lenses that cost more than your whole rig. The kit lens is fine until you can articulate exactly why it’s holding you back.
- RGB lighting before basic three-point lighting. Learn key-fill-back before you buy colored LED tubes.
My Take
The gear conversation in filmmaking is mostly noise. People love talking about cameras. They love arguing about sensor sizes and lens sharpness and bit depth. And none of it matters if you’re not making things.
Under $500, you can put together a kit that shoots professional-looking content. The limitation isn’t the gear — it’s what you do with it. The best filmmakers I know didn’t get better by buying a better camera. They got better by shooting 100 bad videos until the 101st was good.
That’s the whole gig.
Frequently Asked Questions
Can I really make professional video with gear under $500?
Yes. The image quality gap between a $500 kit and a $5,000 kit is narrower than ever. The gaps are in low-light performance, dynamic range, and convenience features — none of which matter for well-lit, carefully framed beginner projects.
Phone vs. dedicated camera for beginners?
Phone wins for convenience, camera wins for control. If you’re shooting talking-head social content, use your phone. If you’re learning exposure, focus, and composition, get a used mirrorless camera.
What’s the single most important upgrade under $50?
Audio, every time. A $20 wired lav mic will improve your videos more than a $200 lens upgrade. Bad audio makes people click away instantly. Fix that first.
Should I buy used gear?
Yes, especially for cameras and lenses. Bodies depreciate fast. A used GH4 or Sony a6000 with a kit lens costs half what it did new and shoots the exact same image. Buy audio gear new (lav mics see wear), but bodies and lenses are safe used.
How soon should I upgrade?
When you can articulate exactly what your current gear prevents you from doing. Not “I want better quality” — specifically: “I need better low-light performance for this interview series” or “I need XLR inputs for multi-mic setup.” Until then, keep shooting.
This article contains affiliate links. If you purchase through these links, I may earn a small commission at no extra cost to you. I only recommend gear I’d use myself.