
Video Editing Basics: How to Make Your Videos Stand Out
Introduction
Video is one of the most powerful and popular forms of communication in the digital age. According to a recent report by Cisco, video will account for 82% of all internet traffic by 2022. That means that if you want to reach and engage your audience online, you need to create compelling videos that stand out from the crowd.
But how do you make your videos more appealing and effective? The answer is video editing. Video editing is not just about cutting and pasting clips together. It is an art and a skill that requires creativity, vision, and technique. Video editing can transform your raw footage into a polished and captivating story that conveys your message, showcases your brand, or expresses your personality.
In this article, we will guide you through the basics of video editing and show you how to make your videos more professional and impactful. We will cover topics such as:
- How to choose the best video editing software for your needs and budget
- How to plan your video project and organize your footage
- How to create a narrative arc that hooks your viewers and keeps them interested
- How to use transitions, effects, titles, music, and sound to enhance your video
- How to export your video in the optimal format and resolution for your platform and purpose
We will also provide you with some useful resources that you can find on filmandlearning.com, such as online filmmaking courses, video production equipment guides, and video storytelling tips. By the end of this article, you will have a solid foundation of video editing knowledge and skills that you can apply to any type of video project.
Key Takeaways
- Video editing is the process of arranging, trimming, enhancing, and adding effects to your video clips to create a coherent and engaging story.
- Video editing can help you improve the quality, clarity, and impact of your videos, whether you want to use them for marketing, education, entertainment, or personal purposes.
- To edit your videos effectively, you need to follow some basic principles and techniques, such as choosing the right software, planning your project, creating a narrative arc, using transitions and effects, and exporting your video in the best format and resolution.
- In this article, we will introduce you to the fundamentals of video editing and give you some tips and tricks to make your videos more professional and captivating.
- We will also recommend some of the best online filmmaking courses, video production equipment guides, and video storytelling resources that you can find on filmandlearning.com.
How to Choose the Best Video Editing Software
The first step in video editing is choosing the right software for your needs and budget. There are many video editing software options available on the market, ranging from free and simple tools to paid and professional ones. The best video editing software for you depends on factors such as:
- The type and complexity of your video project
- The features and functions that you need
- The compatibility with your operating system and hardware
- The learning curve and user-friendliness of the software
- The cost and value of the software
To help you decide which video editing software is best for you, we have compiled a table that compares three of the most popular and widely used options: DaVinci Resolve, Adobe Premiere Pro, and Final Cut Pro.As you can see from the table, each software has its own strengths and weaknesses.
| DaVinci Resolve | Adobe Premiere Pro | Final Cut Pro | |
|---|---|---|---|
| Price | Free or $295 (one-time purchase for Studio version) | $20.99/month or $239.88/year | $299.99 (one-time purchase) |
| Features | – Combines editing, color correction, visual effects, motion graphics, and audio post-production in one software – Offers a dual timeline, source tape, fast review, and smart editing tools – Includes advanced color grading, HDR support, and Fairlight audio tools – Supports collaboration among multiple users with different roles – Allows creating custom effects with Fusion visual effects tools | – Supports a wide range of video formats and codecs – Offers advanced color grading, motion tracking, and multicam editing tools – Integrates with other Adobe products such as After Effects and Media Encoder – Supports 360-degree VR content and HDR video – Allows customizing the interface and keyboard shortcuts | – Uses a magnetic, trackless timeline for editing – Offers powerful organization tools, such as libraries, ratings, tagging, and auto analysis for faces and scenes – Supports 360-degree VR editing and wide color spaces – Includes motion graphics templates, effects, and transitions – Leverages the latest CPUs and GPUs that run on Macs |
| Pros | – Professional-level video editing software with a free version available – Comprehensive and integrated workflow for different tasks – High-performance playback engine and hardware acceleration – Extensive collection of effects and plugins – Flexible interface and media management | – Clear, flexible, and customizable interface – Many organization and collaboration tools – Responsive speed and fast rendering – Excellent stabilization tool – Unlimited multicam angles | – Seamless and efficient video editing – VR handling features – Organized assets – 2D and 3D titles – Fast video completion |
| Cons | – Steep learning curve for beginners – Requires a powerful computer system to run smoothly – Some features are only available in the Studio version, such as noise reduction, stereoscopic 3D tools, and HDR grading – The free version has some limitations on output formats and resolutions | – Intimidating interface for nonprofessionals – Some techniques require additional applications, such as After Effects or Media Encoder – No sound effect samples included | – Only works on Mac desktops – Audio editing still has room for improvement – Timeline editing can be a little awkward – No search in import dialogs – 360-degree video editing does not include stabilization or motion tracking |
There is no definitive answer to which one is the best, as it depends on your personal preference and needs. However, we recommend DaVinci Resolve as the optimal video editing software for beginners and intermediate users, as it offers a free version that has most of the features that you will need, and it is compatible with all major operating systems. DaVinci Resolve is also known for its exceptional color correction and grading tools, which can make a huge difference in the quality and mood of your videos.
If you want to learn more about how to choose the best video editing software, you can check out our comprehensive guide on filmandlearning.com, where we review and compare more options and give you some tips on how to use them effectively.
How to Plan Your Video Project and Organize Your Footage
Before you start editing your video, you need to have a clear plan and vision for your project. Planning your video project will help you save time, avoid mistakes, and achieve your goals. Here are some steps that you should follow to plan your video project:- Define your purpose and audience. What is the main message or goal of your video? Who are you trying to reach and influence? How do you want them to feel or act after watching your video?
- Write a script or outline. A script or outline is a document that describes what will happen in your video, including the dialogue, narration, actions, transitions, and effects. A script or outline will help you structure your story, clarify your ideas, and communicate your vision to others.
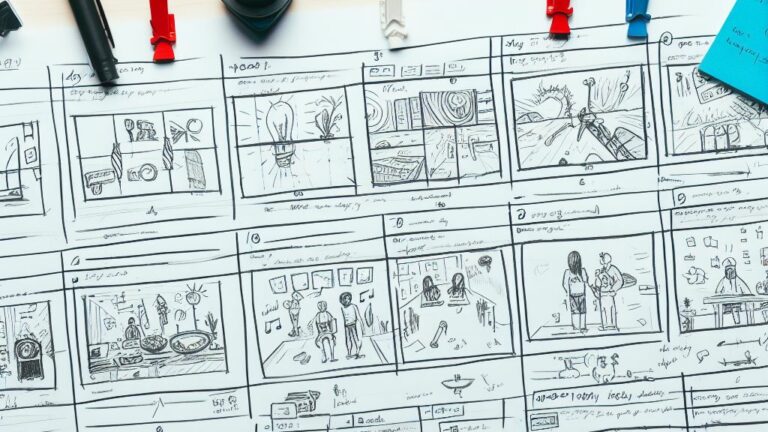
- Create a storyboard or shot list. A storyboard or shot list is a visual representation of your script or outline, showing how each scene or shot will look like. A storyboard or shot list will help you visualize your story, plan your shots, and organize your footage.
- Gather your footage. Depending on the type of video that you are making, you may need to record new footage or use existing footage from various sources. Make sure that you have enough footage to cover your story and that it is of high quality and resolution.
- Organize your footage. Once you have gathered your footage, you need to organize it in a way that makes sense and makes it easy to find and edit. You can use folders, labels, tags, ratings, or keywords to sort and categorize your footage by scene, shot, date, location, or any other criteria that works for you.
How to Create a Narrative Arc that Hooks Your Viewers and Keeps Them Interested
One of the most important aspects of video editing is creating a narrative arc that hooks your viewers and keeps them interested throughout your video. A narrative arc is the structure or shape of your story, showing how it progresses from the beginning to the end. A narrative arc usually consists of five elements:- Exposition: The exposition introduces the main characters, setting, and conflict of your story. It sets the stage for what will happen next and establishes the tone and mood of your video.
- Rising action: The rising action builds up the tension and suspense of your story by showing how the characters try to resolve the conflict or achieve their goals. It also introduces new challenges or complications that make things more difficult or interesting for them.
- Climax: The climax is the turning point or peak of your story, where the conflict reaches its highest intensity and the outcome is decided. It is usually the most exciting and dramatic part of your video.
- Falling action: The falling action shows the consequences or results of the climax and how they affect the characters and their situation. It also resolves any loose ends or subplots that were introduced earlier in the story.
- Resolution: The resolution concludes your story by showing how the characters have changed or learned from their experience and how they move on with their lives. It also leaves a lasting impression on your viewers and conveys your message or purpose.
- Start with a hook. A hook is something that grabs your viewers’ attention and makes them curious about what will happen next. It can be a question, a statement, a fact, a quote, an image, a sound, or anything else that sparks interest or intrigue.
- Show, don’t tell. Showing means using visual or auditory elements to convey information or emotion instead of using words or narration. Showing is more powerful than telling.
Continuing the article on Video Editing Basics:
- because it allows your viewers to use their imagination and empathy to fill in the gaps and relate to your story. For example, instead of telling your viewers that your character is sad, you can show them crying, looking down, or listening to sad music.
- Use the rule of thirds. The rule of thirds is a composition technique that divides your frame into nine equal parts using two horizontal and two vertical lines. The rule of thirds suggests that you place your main subject or point of interest along one of these lines or at one of their intersections, rather than in the center of the frame. This will create a more balanced and dynamic image that draws your viewers’ eyes and attention.
- Use the 180-degree rule. The 180-degree rule is a continuity technique that ensures that the spatial relationship between your characters and objects remains consistent throughout your video. The 180-degree rule states that you should imagine a line that connects your main characters or objects and keep your camera on one side of that line. This will prevent confusion and disorientation for your viewers, especially when you switch between different shots or angles.
- Use transitions wisely. Transitions are effects that link one shot or scene to another, such as cuts, fades, wipes, or dissolves. Transitions can help you create a smooth and seamless flow for your video, as well as convey a change in time, location, mood, or perspective. However, you should use transitions sparingly and appropriately, as overusing them can make your video look amateurish or distracting. As a general rule, you should use simple cuts for most of your video, and reserve other transitions for special occasions or purposes.

How to Use Transitions, Effects, Titles, Music, and Sound to Enhance Your Video Editing
Another important aspect of video editing is using transitions, effects, titles, music, and sound to enhance your video. These elements can help you add more interest, variety, and emotion to your video, as well as reinforce your message and brand identity. Here are some tips on how to use these elements effectively:- Transitions: As we mentioned before, transitions are effects that link one shot or scene to another. Some of the most common types of transitions are:
- Cut: A cut is the simplest and most common type of transition, where one shot ends and another one begins abruptly. A cut can create a sense of continuity and realism for your video, as well as speed up the pace and rhythm.
- Fade: A fade is a type of transition where one shot gradually disappears or appears on the screen. A fade can create a sense of closure or opening for your video, as well as indicate a change in time or mood.
- Wipe: A wipe is a type of transition where one shot replaces another one by moving across the screen in a certain direction or shape. A wipe can create a sense of movement and direction for your video, as well as emphasize a connection or contrast between two shots.
- Dissolve: A dissolve is a type of transition where one shot gradually blends into another one on the screen. A dissolve can create a sense of smoothness and harmony for your video, as well as suggest a relation or similarity between two shots.
- The purpose and meaning of the transition. What do you want to achieve or convey with the transition? How does it relate to your story and message?
- The duration and timing of the transition. How long do you want the transition to last? When do you want it to start and end? How does it fit with the rhythm and pace of your video?
- The style and tone of the transition. How does the transition match with the mood and atmosphere of your video? How does it reflect your brand identity and personality?
- Effects: Effects are modifications or enhancements that you can apply to your video clips to change their appearance or quality. Some of the most common types of effects are:
- Color correction: Color correction is the process of adjusting the color balance, saturation, contrast, brightness, and exposure of your video clips to make them more accurate,
Continuing the article on Video Editing Basics:
- Color grading: Color grading is the process of applying artistic or stylistic color effects to your video clips to create a certain mood, atmosphere, or theme for your video. For example, you can use warm colors to create a cozy and romantic feel, or cool colors to create a tense and mysterious feel.
- Filters: Filters are preset effects that you can apply to your video clips to change their look or style. For example, you can use a sepia filter to create a vintage or nostalgic look, or a sketch filter to create a cartoon or comic look.
- Stabilization: Stabilization is the process of reducing or removing the shakiness or jitteriness of your video clips caused by camera movement or vibration. Stabilization can make your video more smooth and steady, as well as prevent motion sickness or discomfort for your viewers.
- Cropping: Cropping is the process of cutting out the unwanted or unnecessary parts of your video clips, such as the edges, borders, or backgrounds. Cropping can help you focus on the main subject or point of interest of your video, as well as improve the composition and framing of your shots.
- Speed: Speed is the process of changing the playback rate of your video clips, making them faster or slower than normal. Speed can help you create different effects for your video, such as slow motion, fast forward, reverse, or freeze frame.
When using effects for your video, you should consider the following factors:
The purpose and meaning of the effect. What do you want to achieve or convey with the effect? How does it relate to your story and message?
The amount and intensity of the effect. How much do you want to apply the effect to your video clip? How strong do you want the effect to be? How does it affect the quality and clarity of your video?
The style and tone of the effect. How does the effect match with the mood and atmosphere of your video? How does it reflect your brand identity and personality?
Titles: Titles are text elements that you can add to your video to display information or messages. Some of the most common types of titles are:
- Intro: An intro is a title that appears at the beginning of your video, introducing your topic, title, logo, or slogan. An intro can help you capture your viewers’ attention and interest, as well as establish your identity and credibility.
- Outro: An outro is a title that appears at the end of your video, concluding your topic, thanking your viewers, inviting them to take action, or promoting your website, social media, or other products. An outro can help you leave a lasting impression on your viewers and encourage them to follow up with you.
- Lower third: A lower third is a title that appears at the lower third of your screen, displaying information such as names, titles, locations, dates, or facts. A lower third can help you provide context and details for your video, as well as enhance your professionalism and authority.
- Caption: A caption is a title that appears at the bottom of your screen, showing the dialogue or narration of your video in written form. A caption can help you make your video more accessible and understandable for viewers who are deaf, hard-of-hearing, or speak a different language.
When using titles for your video, you should consider the following factors:
- The purpose and meaning of the title. What do you want to communicate or emphasize with the title? How does it relate to your story and message?
- The size and position of the title. How big do you want the title to be? Where do you want it to appear on the screen? How does it fit with the rest of your video elements?
- The font and color of the title. What typeface do you want to use for the title? What color do you want to use for the title? How does it match with the style and tone of your video?
- Music: Music is an audio element that you can add to your video to create a background sound or soundtrack. Music can help you set the mood and tone for your video, as well as evoke emotions and feelings for your viewers. Some of the most common types of music are:
- Ambient: Ambient music is a type of music that creates a subtle and soothing sound that blends with the environment or atmosphere of your video. Ambient music can help you create a calm and relaxing feel for your video, as well as fill in any silence or noise gaps.
- Instrumental: Instrumental music is a type of music that uses only musical instruments without any vocals or lyrics. Instrumental music can help you create a varied and dynamic sound that matches with
Continuing the article on Video Editing Basics:
- the pace and rhythm of your video, as well as highlight the key moments or actions.
- Vocal: Vocal music is a type of music that uses human voices with or without lyrics. Vocal music can help you create a personal and emotional connection with your viewers, as well as convey a message or theme for your video.
When using music for your video, you should consider the following factors:
- The purpose and meaning of the music. What do you want to achieve or convey with the music? How does it relate to your story and message?
- The genre and style of the music. What kind of music do you want to use for your video? What mood or atmosphere do you want to create with the music? How does it match with the tone and genre of your video?
- The volume and balance of the music. How loud do you want the music to be? How do you want to mix the music with the other audio elements of your video, such as dialogue, narration, or sound effects? How does it affect the clarity and impact of your video?
- Sound: Sound is an audio element that you can add to your video to create a realistic or stylized sound that complements or contrasts with the visual elements of your video. Sound can help you enhance the quality and immersion of your video, as well as add more interest and variety to your video. Some of the most common types of sound are:
- Dialogue: Dialogue is the spoken words or conversations between the characters or speakers in your video. Dialogue can help you convey information, emotion, personality, or relationship for your video, as well as engage your viewers and make them care about your characters or speakers.
- Narration: Narration is the spoken words or commentary by a narrator or voice-over artist in your video. Narration can help you explain, guide, or interpret your video for your viewers, as well as provide context, background, or perspective for your video.
- Sound effects: Sound effects are artificial or natural sounds that are added to your video to create a realistic or stylized sound that matches or enhances the visual elements of your video. Sound effects can help you create a sense of realism and immersion for your video, as well as emphasize or dramatize certain actions or events in your video.
- Foley: Foley is a type of sound effect that is created by recording and manipulating everyday objects or materials to create a realistic or stylized sound that mimics the movements or actions of the characters or objects in your video. Foley can help you create a more authentic and detailed sound for your video, as well as add more texture and nuance to your video.
When using sound for your video, you should consider the following factors:
- The purpose and meaning of the sound. What do you want to achieve or convey with the sound? How does it relate to your story and message?
- The source and quality of the sound. Where do you get the sound from? Is it recorded live, downloaded from a library, or created from scratch? How clear and crisp is the sound? How does it affect the quality and credibility of your video?
- The volume and balance of the sound. How loud do you want the sound to be? How do you want to mix the sound with the other audio elements of your video, such as music, dialogue, or narration? How does it affect the clarity and impact of your video?
These are some of the tips on how to use transitions, effects, titles, music, and sound to enhance your video. However, there is no definitive answer to how much or how often you should use these elements, as it depends on your personal preference and style. The best way to learn and improve your video editing skills is to practice, experiment, and watch other videos for inspiration and feedback.
If you want to learn more about how to use transitions, effects, titles, music, and sound for your video, you can check out our website filmandlearning.com, where we have a section dedicated to choosing the best editing software. There you can find articles, videos, podcasts, and courses that will teach you how to use various features and functions of different editing software options such as DaVinci Resolve, Adobe Premiere Pro, and Final Cut Pro.
How to Export Your Video in the Optimal Format and Resolution for Your Platform and Purpose
The final step in video editing is exporting your video in the optimal format and resolution for your platform and purpose. Exporting your video means saving it as a file that can be played back on different devices or platforms. Format refers to the type or extension of the file, such as MP4, MOV, AVI, etc. Resolution refers to the size or quality of the image, measured in pixels (width x height), such as 1920 x 1080 (Full HD), 3840 x 2160 (4K), etc.
The optimal format and resolution for your video depend on factors such as:
- The platform or purpose of your video. Where do you want to upload or share your video? Is it for YouTube, Facebook, Instagram, Vimeo, etc.? Is it for personal, educational, or professional use? Different platforms or purposes may have different requirements or preferences for the format and resolution of your video.
- The quality and size of your video. How good do you want your video to look? How much storage space or bandwidth do you have? Higher quality and resolution usually mean larger file size and longer upload or download time. You may need to balance between quality and size depending on your needs and resources.
- The compatibility and accessibility of your video. How compatible is your video with different devices or platforms? How accessible is your video for different viewers or audiences? You may need to choose a format and resolution that can be played back on most devices or platforms, as well as provide options such as subtitles, captions, or audio descriptions for your video.
To help you decide which format and resolution to use for your video, we have compiled a table that shows some of the most common and recommended options for different platforms or purposes:
Platform/Purpose Format Resolution YouTube MP4 with H.264 codec 1920 x 1080 (Full HD) or 3840 x 2160 (4K) Facebook MP4 with H.264 codec 1280 x 720 (HD) or 1920 x 1080 (Full HD) Instagram MP4 with H.264 codec 1080 x 1080 (Square) or 1080 x 1920 (Vertical) Vimeo MP4 with H.264 codec 1920 x 1080 (Full HD) or 3840 x 2160 (4K) Personal MP4 with H.264 codec Depends on your device and preference Educational MP4 with H.264 codec Depends on your platform and audience Professional MOV with ProRes codec Depends on your project and client As you can see from the table, MP4 with H.264 codec is the most common and versatile format for most platforms or purposes, as it offers high quality and compatibility with low file size. However, you may need to use other formats or codecs depending on your specific needs and preferences.
If you want to learn more about how to export your video in the optimal format and resolution, you can check out our website filmandlearning.com, where we have a section dedicated to exporting your video. There you can find articles, videos, podcasts, and courses that will teach you how to use various settings and options of different editing software options such as DaVinci Resolve, Adobe Premiere Pro, and Final Cut Pro.
Conclusion
Video editing is a fun and rewarding skill that can help you create amazing videos that stand out from the crowd. Whether you want to use video for marketing, education, entertainment, or personal purposes, you need to master the basics of video editing to make your videos more professional and impactful.
In this article, we have covered some of the fundamentals of video editing, such as:
- How to choose the best video editing software for your needs and budget
- How to plan your video project and organize your footage
- How to create a narrative arc that hooks your viewers and keeps them interested
- How to use transitions, effects, titles, music, and sound to enhance your video
- How to export your video in the optimal format and resolution for your platform and purpose
We hope that this article has given you a solid foundation of video editing knowledge and skills that you can apply to any type of video project. However, this is just the tip of the iceberg, as there is so much more to learn and explore in the world of video editing.
If you want to learn more about video editing and take your skills to the next level, we invite you to visit our website filmandlearning.com, where we have a wealth of resources that will help you become a better video editor. On our website, you can find:
- Online filmmaking courses that will teach you everything from pre-production to post-production in a fun and interactive way
- Video production equipment guides that will help you choose the best cameras, microphones, lights, tripods, etc. for your video projects
- Video storytelling resources that will help you craft compelling stories for your videos using various techniques and tools
- Choosing the best editing software resources that will help you use various features and functions of different editing software options such as DaVinci Resolve, Adobe Premiere Pro, and Final Cut Pro
- Exporting your video resources that will help you use various settings and options of different editing software options such as DaVinci Resolve, Adobe Premiere Pro, and Final Cut Pro
By joining our website filmandlearning.com, you will also get access to our community of passionate and supportive video editors who are eager to share their tips.